The trail is nearly ready to be revealed. I’m still
awaiting information from one or two stragglers – you know who you are so I’ll
not be doing any ‘naming and shaming’ here - but most of the scarecrows have now
been located, either on private premises or up at All Saints’ Church. Soon, I’ll
be pestering competitors who have not, as yet, given me a title for their entry.
Friday 31 May 2013
Flying Pigs

I just had to snap some shots of these fantabulous pigs that I found today at Frost’s Garden Nursery in Woburn Sands. Made from recycled cans and other metal containers, they are an object lesson on how to make something creative out of discarded materials.

Now that I’ve explored
scarecrow making, making scarecrow animals is now on the agenda. I’ll be
drawing inspiration for these colourful and amusing pigs.

Saturday 25 May 2013
Thank You, Home Retail Group!
I’m thrilled to hear that the Home Retail Group has
agreed to provide some top up funding for our Scarecrow Trail. The Home Retail
Group comprises Argos, Homebase and Habitat. The Group describes itself as the
UK’s leading home and general merchandise retailer. They aim to shape the
future of shopping by investing in a range of in-store and on-line options to
browse and purchase their retail offering, by developing their product ranges
and services, and by ensuring that they bring unrivalled convenience to
customers' everyday lives, whether shopping at home or on the move. My thanks
especially to Ruth, who put in this successful bid for sponsorship.
Wednesday 22 May 2013
Rosettes

I’ve just ordered our personalized rosettes
from Castle Rosettes. Everything is coming together nicely!
Monday 20 May 2013
Parish Council Update
Yesterday
evening I attended a regular monthly meeting of Loughton and Great Holm Parish
Council, to give the councillors an update on how the arrangements for the
trail are progressing. As my report gives a good ‘potted summary’ of what is
planned for the trail, I though I’d publish it here.
1. There will be a good display of scarecrows
To date
I’ve had 59 entries for the trail, including:
- 29 adults / families
- 8 children
- 10 businesses
- 12 schools and children’s organizations
More actual
scarecrows will be on show, as several entries are tableaux.
2. We have a Scarecrow Trail
The trail
has been provisionally mapped out. The extended trail is about 5 miles long. Of
the 59 entries, only 17 are outside the old village and the Bradwell Road, so
it is possible to see 70% of the ‘crows’ by walking a shorter route within the old
village core. I am working on a car trail that will take in the longer route
and checking its accessibility for wheelchairs, scooters etc. Certificates will be awarded to those
who complete the extended trail!
3. There will be prizes!
Prizes
will be awarded to the winning ‘crows’, but I have settled on vouchers to spend
at leading MK stores, rather than cash prizes:
- · The first prize in the Family competition will win £50, with two runners up each winning £20.
- · In the Children’s class, the winner will receive a voucher for £20, and the two runners up £10 each.
- · The winning Organization will receive a £50 to spend at a leading luxury chocolate retailer.
- · The winning School / Children’s Organisation will win a voucher for £80, and the two runners up £30 each.
- · Finally, the scarecrow that receives the most votes in the Visitors’ Choice will receive a gift voucher for £50.
There
will also be plenty of rosettes to award to other scarecrows.
4. Judges
Three
Judges have been appointed, one from MK Arts Gateway and two from MK
Gallery.
5. Raffle
Tickets are
now available for sale at 50p each. Prizes already pledged include: a first prize of £100.00, a summer
hamper, an adult and an under 16 Go Kart Experience at
Daytona, a month’s free subscription to Fusion Fitness and a stylish,
contemporary quilt.
More prizes
will be added closer to the event.
6. Timeline
Between now
and the end of June - just over a month to go – all the entrants onto the trail
should be busy building their scarecrows. The event proper kicks off on Friday
28th June.
Noon on
Friday 28th June
– all scarecrows to be on display for judging. This will take place during the
afternoon. Winners announced and rosettes awarded to
prizewinners on Friday evening.
10.00 a.m.
to 5.00 p.m. on Saturday 29th June and Saturday 6th July, and 11.00
a.m. to 5.00 p.m. on Sunday 30th June
– All Saints’ Church open to trail visitors.
Daylight
hours from Monday 1st July to Friday 5th
July. Scarecrows in private gardens
and at local schools and business premises will be out on display. However, All
Saints Church will not be open during the week.
7. Goings On Up at the Church
When
the Church is open at weekends visitors will be welcomed to the following
additional attractions:
- · Trail Guides and Raffle Tickets on sale,
- · Plant Swap Stall,
- · Crafts Stall
- · Second Hand Book Stall
- · Embroidery Exhibition
- · Refreshments and Cakes on sale in the Church Room in the afternoons.
8. The Grand Finale of a Scarecrows’ Supper.
This will be held in
All Saints’ Church between 7.00 p.m. – 10.00 p.m. on Saturday 6th July. There will be a ‘Bring and Share’
supper, in which all the basic ingredients like bread, butter and spreads, dips
and pickles, nibbles and crisps, salads, fruit and soft drinks will all be
provided and each family, couple or individual who attends will be asked to
provide a small sweet or savoury contribution to the feast. We are hoping to
emulate the ‘miracle of the loaves and fishes’ in ensuring that, by asking for
a small additional contribution from supper-goers, everyone will have enough to
eat!
Tickets will
be available soon at a price of £4.00 per adult and £1.00 per child. After the
first 2 children, the rest come free, so a family of 4 or more can come to the
supper for £10.00.
After
supper, there will be entertainment that will include:
· an ‘All Saints’ Variety Performance’;
· the winner of the ‘Visitor’s Choice scarecrow will be
announced;
· The
Grand Raffle prizewinners will be drawn;
· There will be a Scarecrow Auction; and
· An Auction of Gifts and Promises. (an hour’s
gardening advice, unique car trips with ‘Mr. Toad’, more Daytona experiences,
and a patchwork quilt have already been promised)
9. Thanks
Finally, I
thanked the Parish Council for its support of the initiative, for arranging
publicity in the Parish Magazine and on the Parish Website, and especially to
the Parish Clerk for pinning up posters on all the Parish Notice-boards.
Sunday 19 May 2013
A Good Time Was Had By All
Yesterday afternoon
we held a Scarecrow Making Workshop up at All Saints’ Church.

The seven adults and
two children who came along made six scarecrows altogether, assisted by three
stalwart helpers, Valerie, David and Julienne.

Rev. Dave Bell and Labrador Cassie
dropped in to admire the results and thanks to everyone’s generosity we raised £60.00
for the Church.


The following
scarecrow building kits, left over from the workshop, can be purchased from Julienne
for the princely sum of £10.00 each:
- · 2 x Kirstie style freestanding armatures (timber frame)
- · 2 x Mister Softee soft- bodied armatures (pipe insulation)
- · 2 x basic t-shaped scarecrows, each of which comes with two pairs of tights (for arms and legs) and a pillowcase (for a torso)
The demonstration
Kirstie style armature together with its stuffed scarecrow body, which can be seen in the background to the second photo down, is also for sale at £15.00 if anyone wants to make a flying start on their entry. All the proceeds
from any sales will be given to All Saints' Loughton.

Saturday 18 May 2013
Cut Piece Cut!
Recently, MK Festival Fringe put out a call in which they would fund a proposal by an artist or arts organisation to create an unique
installation in a vacant retail unit in the Theatre District, in Central Milton
Keynes. The installation built by the winner of this small grant will form part of a three day Fringe programme of
performance, dance, music and visual arts, that will take place between 19th -21st July 2013, within the Theatre
District
I submitted a proposal
on behalf of All Saints’ Loughton and the local community, to take about fifty of
our scarecrows that had been offered for auction, to the shop in order to build an
installation that would have reinterpreted the scarecrows, en mass, into a fascinating
and colourful narrative about scarecrows.
Visitors to the installation would
have encountered a multi-sensory experience that included viewing the scarecrows,
touching some of them and/or the materials from which they were constructed,
and listening to a soundscape, produced specially to accompany the exhibition. The installation
could also have included demonstrations of scarecrow making and storytelling on scarecrow-related
themes.
The 'piece de resistance' would have been to facilitate visitors to the shop in joining in the performance by embellishing a large scarecrow figure with pieces of fabric and other unique, hand made decorations – the opposite process to Yoko Ono’s famous 1960’s art performance, ‘Cut Piece’.
Unfortunately, I was
not successful with my application. So that’s less work
for me, then!
Friday 17 May 2013
Mister Softee
I’ve made some modifications to the soft-bodied
armature that I used for Farmer George (see my blog for Monday 8th
April 2013). A visit to B&Q established that Climaflex foam pipe insulation
comes in 2 metre lengths, and a variety of at least three diameters: 48 mm, 65 mm and 78 mm.
Each ‘crow’ takes one thick tube cut in two for the
legs, half a thinner tube for the torso, one thin tube for the arms and half a
thin tube for the hips. The finished ‘crow’ is light and flexible. I’ll be
offering him as an alternative to the freestanding ‘crow’ at tomorrow’s
workshop.

This scarecrow’s torso can be strengthened by
pushing a length of wooden dowel up the centre of the pipe. The dowel can
either be short, just long enough to stiffen the neck whilst leaving the ‘crow’
able to bend at the waist, or long so that the whole of the torso is strengthened.
The dowel can even be long enough to act as a centre post that can be pushed
into the ground to support the scarecrow.
Remember to drive a hole into the ground using a
separate piece of dowel or rod, as the ‘crow’ itself will not be able to
withstand being driven into hard ground.
The hips and legs are made by cutting the thickest
diameter pipe in two to make two legs, each a metre long, before winding the
half of the thin tube round the top of one leg, interlacing it at the bottom of
the torso, and then again at the top of the other leg, securing each twist with
strong twine or string as you go. The hips hold the legs in place by natural
friction.
Two pieces of wooden dowel can be inserted, one
down the centre of each leg, so that the legs are stiff and can support the
scarecrow when the free ends are put in the ground. As before, the holes needs
to be made first, so do not try to push the dowels that stiffen the legs
straight into the ground without first preparing two holes to receive them.
The arms are made by overlapping two of the thin
pipes to form the shoulders and taping the ends. The torso pipe can then be
inserted into the space formed between the shoulders, where the arm pipes
overlap. The arms can be posed.

At this stage, if gently encouraged the shoulders
will slide up and down the torso. Slide them down, and place a face bag lined
with a plastic bag over the top of the torso, stuff it with scrunched up
newspaper, and seal the neck end with builder’s tape. Trim away any surplus and
slide the shoulders back up to the neck. Secure the shoulders more firmly at
the neck with builder’s tape.

The torso can be ‘dressed’ with a T-shirt, and
stuffed. The arms and legs can also be padded out in the usual way, but
depending on how you want your ‘crow’ to look, this may not be necessary. The arms, legs and torso can all be trimmed shorter with scissors if a 'crow' of smaller proportions is required.

'Thank You' Routeco!
Our grateful thanks go to Routeco
Limited, a company based in Knowlhill in the civil parish of Loughton, whose
Chief Executive Officer has donated £50.00 to All Saints’ Church to support our
Scarecrow Trail. Routeco was formed in 1978 and has established itself as the
leading supplier of industrial control, automation and process products in
the UK. It is amazing to see all the products that are shown on their website, http://www.routeco.com/, where it is possible to source everything from cables
to computers, light bulbs to motion controls and sensors to wiring accessories.
Routeco is one of a small number of generous sponsors who are helping to make our
Scarecrow Trail a financial success. Thank You, Routeco!
Finishing Kirstie's Freestanding ‘Crow’
Yesterday's blog left the scarecrow at the bare armature stage. Here's what happened next.
Step Five – Make the Body.
For this, I used a pillowcase. My method was slightly different to Kirstie’s in that I stapled the back of the opening to
the scarecrow’s shoulders, put a bin sack inside to waterproof the newspaper
stuffing, and filled up the pillowcase. The body hangs down in front of the vertical
support, from the shoulders, and will be held in place by any clothes that are
used to dress the scarecrow later. Meanwhile, the torso is very easy to stuff. It is surprising how much paper it takes to stuff
a scarecrow!


Step Six - Attach the legs
These were made from a pair of old, thick tights. The
first step was to stuff the legs of the tights firmly with newspapers contained
in smaller plastic bags, up to the top of the legs. I put the scarecrow’s
tights on when the pillowcase was about half full of newspaper. The tights give
the ‘crow’ a nipped in waist. They are self supporting, but if you are worried
about them staying on, you can pin them in place with safety pins.

More newspapers were added to the pillowcase,
until the scarecrow was stuffed full up to the top. At this point, the bin sack
and the front of the pillowcase were stapled to the shoulders to close up the
body. If you want a fatter scarecrow, you can add more plastic bags containing
newspaper to the tummy or hips, between the pillowcase and the tights, to
provide additional padding.
If the legs stretch, as sometimes happens with
tights, you can adjust their length at any point in the ‘build’ by squeezing
the papers up from the toes, and tying a knot at the foot end, to shorten the
legs. Remember, though, to leave enough length of ‘leg’ to form a foot. The same applies to the arms. You can see the knots where I have shortened by scarecrow's arms.

The arms were made from another pair of old tights, with the pants cut off. As before, the tights were stuffed with newspaper, contained in small plastic bags. It is good to adjust the size of the bag to the size of the limb that is being modelled: larger bags for the torso and thighs, smaller bags for the arms. Likewise, it is good to scrunch smaller balls of newspaper for the smaller limbs and larger balls for the torso. When they were full, the arms were stapled firmly to each shoulder using a staple gun. This is a job for a grown up!
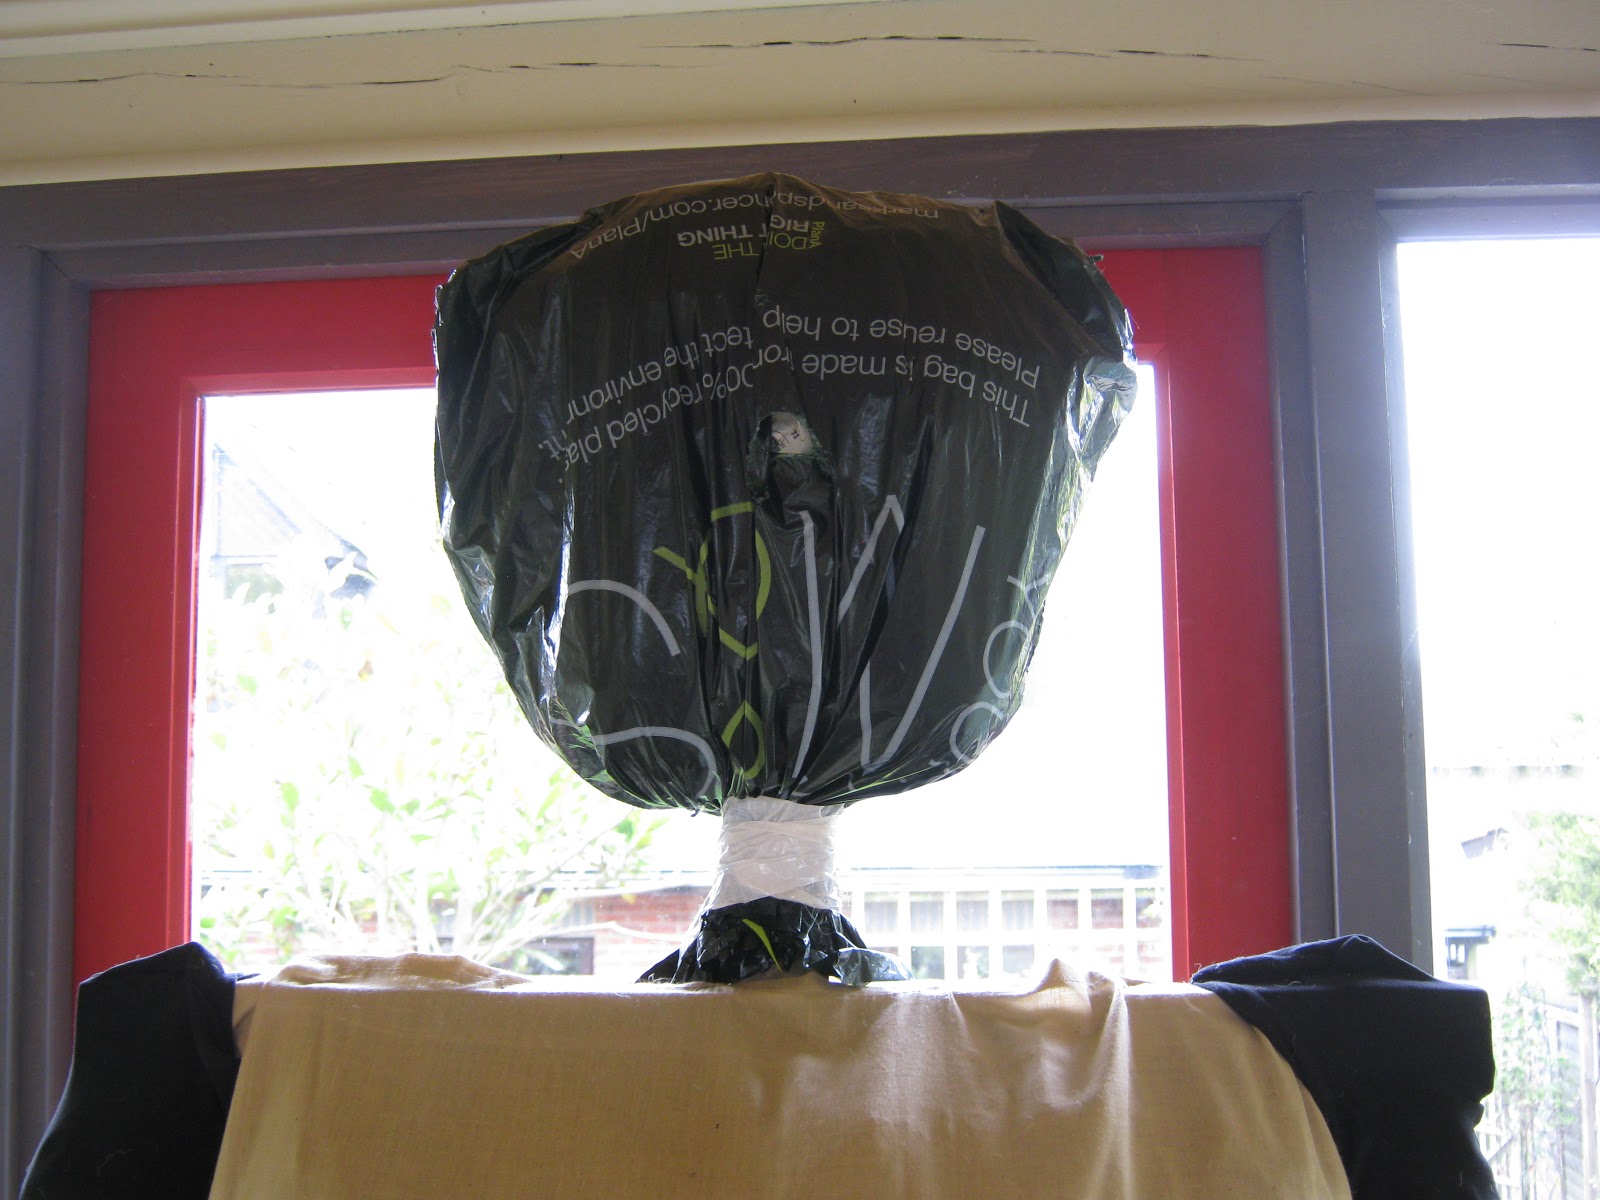
Step Seven - The Face.
Kirstie used a pillowcase for her scarecrow but I
used a smaller rectangular face bag, with a finished size of about 400 mm wide by 600 mm deep. These were run up quickly on a sewing machine from flesh
coloured cotton, calico or hessian. The face should be decorated before it is
put on the ‘crow’. As mine is just a demonstration, I have not decorated my scarecrow's face. Buttons are good, or a painted face looks great.

A few points to bear in mind:
·
The plastic bag that is used to waterproof the face
needs to be thicker and stronger than those used to contain the body stuffing
as it takes quite a beating when the face is stuffed.
·
I put the plastic bag onto the face plate, stuffed
it with small balls of newspaper and secured it with builder’s tape, and then I
slipped the face bag on afterwards, as it is easier to stop the newspapers from
falling out at the neck if you are only manipulating one layer. If you do this,
make sure that you don’t over stuff the plastic bag, though newspaper is very
forgiving and can be squeezed small so that the face bag can be pulled down.
·
If you are making a larger than life sized head,
check that any clothes that do not open down the front will go over the head
before you attach it to the armature.
Step Eight- Dress The Scarecrow
At this point, almost anything goes. Safety pins
come in useful. Clothes can be made to look older by sewing or gluing on colourful
patches cut from different materials. I can’t wait to see what people bring to
tomorrow’s workshop to dress their ‘crows’.

Thursday 16 May 2013
Kirstie’s Freestanding ‘Crow’ - Part One, The Armature
This armature is based on the frame that was made
for a freestanding scarecrow, which featured in ‘Kirstie’s Handmade Britain’,
first screened in 2011: http://www.channel4.com/programmes/kirsties-handmade-britain/4od#3276655.
Instructions for making the scarecrow can still be downloaded from the Chanel 4
website.
This armature is great if you require a really
stable, freestanding scarecrow that need not be driven into the ground or
propped against a support. However, be warned! This is not a project for a
novice builder. Having road tested Kirstie’s instructions, David offers
the following advice.
1)
The instructions for the cross-section of each of
the pieces of wood required to build the armature should be read as millimeters
(mm), not centimeters (cm). Our instructions are all in millimeters (mm), which
is the unit of measurement used by the building trade.
2)
Step One - The Square Base. Kirstie’s
instructions for Step One recommend that the two chunky, 900 mm long cross
pieces, which make up the solid wooden base, should be half lap jointed
(notched). In large cross-section wood (Kirsty’s was 70 x 70 mm in section, ours
was 85 x 35 mm) this requires the use of a handsaw and a chisel, and some
expertise in woodwork. The result is neat and this method is shown in our photographs. However, an easier alternative is to lap the timbers without cutting
anything away, and to nail or screw two wooden blocks (each made from the same
wood as the cross pieces and about 100 mm long) to the underneath of the upper
cross piece so that the base will stand level.

3)
Step Two – Preparing the Frame. We’d
recommend that the ‘arms’ of this particular armature should be cut to shoulder
width (about 500 mm) so that the clothes can be put on more easily, and to
enable the armature to be moved about, without any danger of bashing into
anything or anyone. It is heavy and cumbersome to lug around.
Kirsty
recommends that the upright centre post of the scarecrow and the horizontal
cross piece that forms the shoulders and arms should also be notched like the
base, before the two pieces of wood are glued or screwed together. There is no
need to do this, other than for neatness. Laying one piece of wood on top of
the other at right angles and nailing or screwing them together without a notch
is stronger, and is undetectable when the scarecrow has been dressed and
stuffed. You can see the result in this photo.

I’d
recommend that a small rectangle of plywood or similar board be screwed to the
top of the centre post above the shoulders where the head bag will be placed,
so that the scarecrow’s head cannot swivel around once it has been secured at
the neck. Don't make it too large if you are planning to dress your 'crow' in a T-shirt, or it won't pop over this face plate.
4) Step Three – Screwing the Frame to the Base. David did this by
drilling and screwing in two long screws on opposite sides of the centre post,
set at about 25 mm up from the bottom of the centre post and at 45 degrees,
angled down into the solid timber base, rather than using Kirsty’s method of
one long screw inserted into the scarecrow’s centre post from underneath centre
of the heavy wooden base, which is really difficult.

5)
Step Four – Secure the Frame. The
four 500 mm long supports (braces) that Kirsty recommends to support the
upright centre post of the scarecrow should be cut to slightly different
lengths to enable them all to be screwed to the centre post without the screws
clashing.

6)
It is much easier to use inexpensive, tanalised
tiling batten, which is widely available in 19 x 38 mm, 25 x 38 mm and 25 x 50
mm sections, and is sold in lengths of either 1800 mm or 2400 mm. The 20 x 20
mm sections that Kirsty recommends are too light, are not standard timber cross
sections that can easily be sourced, and are comparatively expensive to buy. There
is a danger that lighter sections will split when screwed together if the screw
holes are not pre-drilled.
I'm heading off to Embroidery Group now. When I get back, I'll complete the soft body parts and give my verdict on the advantages and limitations of this type of 'crow'. I'll be offering this armature as one of the choices available to the crow-builders who are coming to Saturday afternoon's workshop.
Subscribe to:
Posts (Atom)